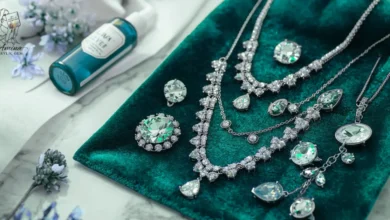
How to Make Acrylic Gems Last Longer: Secrets to Shine & Durability
When I first dipped my toes (well, my nails) into the world of acrylic gem resilience only to watch them chip, lose their sparkle, or vanish entirely — you’re not alone. The big question is: how to make acrylic gems last longer?
In this guide, I’ll share everything I’ve learned through trial, error, and way too many glue purchases. We’ll dive into acrylic gem durability, the best tricks to prevent acrylic gem chipping, tips to keep that mirror-like shine on your acrylic gems, and yes — the ultimate truth about finding the best glue for acrylic gems.
So, let’s make sure your gems don’t just look pretty today but keep shining weeks from now.
The Struggle Is Real (And Relatable)
Raise your hand if you’ve ever:
Lost a gem within 24 hours of applying it.
Picked at the corner of one gem because it felt loose (and then regretted it immediately).
Had a friend ask, “Uh, weren’t there more gems on this yesterday?”
Yep, I’ve been there too. For me, acrylic gems were supposed to be the cherry on top of my art projects and nail looks — only to end up as sad, chipped leftovers. It felt like wasted effort and money. But here’s the thing: it’s not just about the gem itself, it’s about how you prep, apply, and care for them.
Prep Is Everything
Think of acrylic gems like houseguests — they’ll stay longer if you actually prepare a space for them. Before sticking on gems:
Clean the surface thoroughly. Oils, dust, or leftover polish are enemies of acrylic gem durability. A swipe with rubbing alcohol can work wonders.
Smooth the base. A rough or uneven surface makes gems wobble and chip faster.
Dry is key. Even a tiny bit of moisture can shorten your gem’s lifespan.
When I started treating the base like a VIP guest lounge for my gems, suddenly they decided to stay longer
The Glue Game (Or Why I Stopped Using Random Glue)
Let me save you from one of my biggest rookie mistakes: not all glues are created equal. For the longest time, I thought superglue was the magical fix for everything. Spoiler: it’s not, especially not for acrylic gems.
Here’s what actually works:
Specialized nail/stone glue: Designed for longevity and flexibility.
UV gel adhesive: Amazing for nail gems because it cures rock-hard under UV light.
Resin adhesives: If you’re using gems for décor or DIY projects, resin gives incredible hold.
The trick is finding the best glue for acrylic gems for your specific project. Nails need something flexible, while décor may need something rock-solid. Once I switched to purpose-made adhesives, my gems stopped ghosting me.
Protect the Shine
Ever notice how gems start looking dull after a week? That’s because dirt, scratches, and even everyday hand washing can take away the sparkle.
To keep that shine on your acrylic gems:
Top coat for nails: A thin layer of clear top coat around (not over) the gem helps lock it in without dimming its sparkle.
Gentle cleaning: A soft brush or microfiber cloth works better than harsh scrubbing.
Avoid chemicals: Household cleaners, perfumes, or acetone can ruin gems faster than you can say “oops.”
I once used acetone to clean around a gem (rookie move again), and let’s just say it was no longer shiny, just sad. Don’t be me.
Daily Habits That Make or Break Durability
Here’s where empathy kicks in — I get that we don’t always live delicately. We type, cook, wash dishes, craft, and sometimes binge-eat chips (don’t judge me). All these activities affect acrylic gem durability.
Some real-life hacks:
Gloves are your gems’ best friends. Washing dishes? Cleaning? Gloves are non-negotiable.
Don’t use nails as tools. Lifting soda can tabs with gem-covered nails? Recipe for heartbreak.
Be mindful of edges. Gems at corners or tips are more prone to popping off.
It’s like treating gems as tiny, fragile crowns — you wouldn’t use a crown to open a bottle, right?
Fighting the Enemy — Chipping
Nothing feels worse than catching your gem on fabric and hearing that dreaded click as it chips off. To prevent acrylic gem chipping, try this:
Place larger gems in the middle (less risk of snagging).
Use smaller gems near edges.
Seal around gems with top coat or resin for a smoother surface.
Think of it like traffic planning — keep the big “cars” in the center lane, and the smaller ones at the sides for smoother flow.
When Things Still Go Wrong (Because Life Happens)
Even with the best prep, glue, and care, gems sometimes have a mind of their own. And that’s okay. If one pops off:
Keep the gem if you can find it (yes, I’ve crawled on the floor hunting for mine).
Clean the spot before reapplying
Don’t beat yourself up — even pros lose a gem now and then.
It’s not failure, it’s just part of the process.
Why Bother? Because Gems Are Worth It
You might be wondering: “Why go through all this trouble?” Simple — Acrylic Gem Durability elevate everything. They turn plain nails into jewelry, plain crafts into eye-catchers, and plain décor into statement pieces. When they last longer, you get more joy out of your creativity.
And honestly? Watching your gems still sparkle two weeks later feels like a little victory.
Final Thoughts (And a Little Laugh)
So, to recap: if you want to make acrylic gems last longer, focus on prep, use the best glue for acrylic gems, protect their shine, adjust daily habits, and learn a few tricks to prevent acrylic gem chipping. It’s not rocket science — but it is gem science. And gem science deserves a place in your life.
I’ve had my fair share of “gem graveyards” on the bathroom counter, but once I got these steps right, my acrylic gems became loyal companions instead of one-night stands.
Now, I’d love to hear from you:
What’s your funniest or most frustrating acrylic gem story? Did a gem ever pop off at the worst possible moment? (Mine fell off mid-handshake — the horror.) Share in the comments — let’s laugh, cry, and sparkle together.