If you’ve ever looked at a sparkling gemstone in a shop window and thought, “Wow, that’s gorgeous… but my wallet just fainted,” then you’re going to love this. Today, I’m diving into the magical (and surprisingly budget-friendly) world of DIY acrylic resin gems. Yep, you read that right. You don’t need to raid a jewelry store or spend a fortune to enjoy custom colored resin gems—you can make your own, right at home, with just a few supplies and a pinch of creativity.
Now before you imagine me wearing a lab coat, goggles, and shouting “It’s alive!” like Dr. Frankenstein, let me assure you—this is a fun and accessible craft. Whether you’re here for an acrylic ink gem tutorial, a budget resin gem making idea, or just curious about easy resin gem DIY hacks, you’re in the right place. And if “homemade acrylic gemstones” sounds like something only an elf in Middle Earth could pull off, don’t worry—I’ll break it down step by step (no Elvish required).
Why Resin Gems Are the Perfect DIY Craft
Let’s start with the why. Why bother with resin gems when you could just buy shiny stones from a shop? Well:
- Budget-Friendly – Real gemstones can cost more than your entire electricity bill. A small bottle of resin and some acrylic inks? Much kinder to your bank account.
- Customizable Colors – Want a gem that looks like cotton candy? Or one that matches your favorite sports team? With resin and acrylic ink, the color palette is infinite.
- Therapeutic Crafting – Ever heard of “crafternoon therapy”? Stirring, pouring, and watching colors swirl together can be oddly calming—like yoga, but with fewer questionable poses.
- Show-Off Factor – Let’s be honest. When someone asks, “Where did you get that gem necklace?” and you say, “Oh, I made it myself,” the look of surprise is priceless.
I stumbled into resin crafting during a particularly rainy week when Netflix was begging me to binge another season of Stranger Things. Instead, I bought a resin starter kit online, and by the end of the weekend, my desk looked like I had robbed a dragon’s treasure hoard (but, you know, a plastic version).
What You’ll Need to Make DIY Acrylic Resin Gems
Before we start playing gemstone alchemist, let’s talk supplies. You don’t need a warehouse of tools—just a few essentials:
- Resin kit (epoxy resin + hardener)
- Gem-shaped silicone molds (easy to find online)
- Acrylic inks (the secret to those vibrant colors)
- Mixing cups & sticks (because resin and your cereal bowl do not mix)
- Gloves & mask (safety first, friends!)
Optional but fun extras: glitter, mica powders, metallic flakes, or even tiny beads if you want to get fancy.
Step-by-Step Acrylic Ink Gem Tutorial
Step 1: Prep Your Space
Resin is sticky. Like, “ruin your favorite jeans forever” sticky. Cover your table with parchment paper or an old plastic sheet. Gloves on, mask ready.
Step 2: Mix the Resin
Follow the instructions on your resin kit—usually a simple 1:1 ratio of resin to hardener. Stir slowly. If you stir like you’re making cookie dough, you’ll get bubbles (and not the fun kind).
Step 3: Add Color with Acrylic Ink
Here’s where the magic happens. Add a few drops of acrylic ink into your resin. The ink swirls beautifully—like a galaxy forming right in your cup. For pastel shades, use just a touch; for bold gems, go generous.
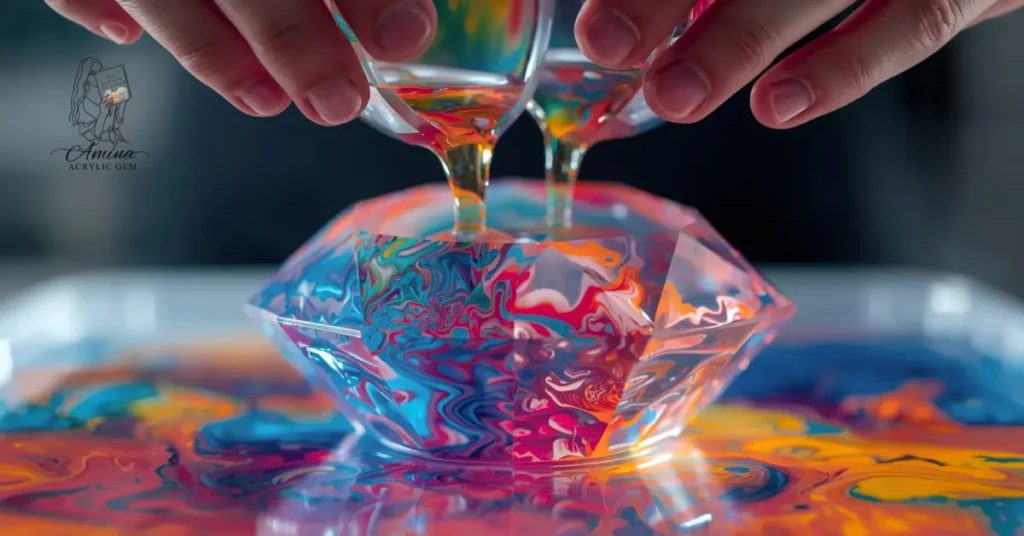
Step 4: Pour into Molds
Carefully pour the mixture into your silicone gem molds. Pro tip: layer different colors to create stunning crystal-like effects. Think of it as painting, but in 3D.
Step 5: Cure & Reveal
Most resins need 24 hours to cure. Yes, patience is key. (I once poked mine at the 6-hour mark and ended up with what looked like a sad gummy bear.) Once cured, pop them out and admire your new homemade acrylic gemstones.
Budget Resin Gem Making Tips
- Reuse molds: Once you buy them, they’ll last for years.
- Experiment with scraps: Got leftover resin? Pour it into smaller molds or even onto cardboard to make quirky mini-gems.
- Dollar-store extras: You don’t need pricey add-ins. A sprinkle of glitter from a $1 pack can look just as luxe.
Think of this like cooking pasta—sure, you can buy imported truffle oil, but spaghetti tastes just as comforting with simple tomato sauce.
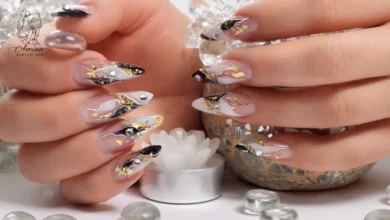
Fun Uses for Homemade Acrylic Gemstones
So you’ve made a handful of gems. Now what?
- Jewelry – Attach to earring hooks, necklaces, or bracelets.
- Decor – Fill a glass jar with gems for a chic display.
- Keychains – Who doesn’t want a gem dangling from their keys?
- Gift toppers – Forget bows—add a resin gem on top of a wrapped gift. Instant wow factor.
Common Mistakes and How to Avoid Them
Cloudy Resin – Usually caused by mixing too fast or in the wrong ratio. Slow and steady wins this race.
Bubbles – Use a heat gun or even a hairdryer on low to gently pop them.
Sticking to Molds – Silicone molds are best. Plastic molds often hold on like clingy exes.
Why This DIY Is More Than Just Crafting
Here’s the thing: making gems is not only about the end product. It’s about the process. Every swirl of color feels like a little victory. And every time you show someone your finished gem, you get that proud, “Yeah, I made this” moment.
In a way, crafting gems is a metaphor for life. You take messy, unformed materials (resin, ink, glitter… emotions?) and with a little patience, you create something solid and beautiful.
And hey—if all else fails, you can always blame your first lumpy gem on “artistic abstraction.” Picasso made a career out of that.
Final Thoughts
Making DIY acrylic resin gems isn’t just about saving money (though it definitely helps). It’s about exploring your creativity, experimenting with colors, and maybe even discovering a new hobby you’ll fall in love with. Whether you’re here for an easy resin gem DIY, trying your hand at a budget resin gem making project, or simply curious about an acrylic ink gem tutorial, I promise—it’s worth rolling up your sleeves for.
So, are you ready to try making your own homemade acrylic gemstones? Or are you still imagining yourself as a medieval jeweler with a resin cauldron? Either way, drop your thoughts below—I’d love to hear how your gems turn out (bonus points if you name them like Pokémon).
And remember: in the world of crafting, it’s not about perfection—it’s about having fun, making a mess, and maybe ending up with something sparkly along the way.